环境:windows10
安装方式:在线、离线
PowerCLI Version:v12.0.0
1、PowerCLI在线安装
快捷键win+q搜索PowerShell,以管理员身份打开,输入
#查找模块
Find-Module -Name VMware.PowerCLI

#安装模块
Install-Module -Name VMware.PowerCLI -Scope CurrentUser
如果您希望它可供计算机的所有用户使用,则您的PowerShell会话必须以管理员身份运行,并且将通过将Scope参数更改为AllUsers,为所有用户自动安装PowerCLI。
2、PowerCLI离线安装
2.1 下载离线zip:https://code.vmware.com/web/dp/tool/vmware-powercli/
2.2 解压到ps模块目录下
C:\Windows\System32\WindowsPowerShell\v1.0\Modules
2.3 打开PowerShell导入模块Import-Module VMware.PowerCLI
2.4 导入报错
如果导入报错:Import-Module : 无法加载文件 C:\WINDOWS\system32\WindowsPowerShell\v1.0\Modules\VMware.VimAutomation.Sdk\VMware.VimAutomation.Sdk.psm1,因为在此系统上禁止运行脚本。有关详细信息,请参阅 https:/go.microsoft.com/fwlink/?LinkID=135170 中的 about_Execution_Policies。
可能是Win10新版本中PowerShell的Execution Policies为Undefined,较严格,修改一下就好。
Set-ExecutionPolicy -ExecutionPolicy RemoteSigned -Scope CurrentUser
Import-Module VMware.PowerCLI
3、关闭PowerCLI提示
预操作:以下两条执行一次以后就不用了,不然老出提示。
#关闭CEIP( Customer Experience Improvement Program 客户体验改进计划)
Set-PowerCLIConfiguration -Scope User -ParticipateInCEIP $false
#忽略证书验证
Set-PowerCLIConfiguration -InvalidCertificateAction Ignore
连接Vcenter:
Connect-VIServer -Protocol https -User 'administrator@vsphere.local' -Password 'yourpass' -Server 192.168.x.x
获取主机:Get-VMHost
获取虚拟机:Get-VM
4、准备PowerCLI脚本及表格
4.1 windows创建一个目录test,点击进入,创建文件esxi_batchinstall_virtual.ps1,把脚本内容拷贝进去,脚本如下:
#Author:Robin
#version:v0.1
#env:stage

$vms = Import-CSV .\DeployVM.csv
$templatenic = 'ifcfg-eth0'
$templateuser = 'root'
$templatepass = 'robinpassword'

Connect-VIServer -Protocol https -User 'administrator' -Password 'robinpassword' -Server 10.10.10.10

foreach ($vm in $vms){

      $Template = Get-Template $vm.Template

      $VMHost = Get-VMHost $vm.PhysicalHost

      $Datastore = Get-Datastore $vm.Datastore
      #新建虚拟机
      New-VM -Name $vm.Name -Template $Template -VMHost $VMHost -Datastore $Datastore -RunAsync -Location $vm.Esxidir

      Start-Sleep -s 60
      Get-VM $vm.Name| Start-VM
      Start-Sleep -s 60

      $sss='hostnamectl set-hostname '+$vm.Hostname+' && sed -i "/^IPADDR/c\IPADDR='+$vm.Ipaddr+'" /etc/sysconfig/network-scripts/'+$templatenic+' && sed -i "/^NETMASK/c\NETMASK='+$vm.Netmask+'" /etc/sysconfig/network-scripts/'+$templatenic+' && sed -i "/^GATEWAY/c\GATEWAY='+$vm.Gateway+'" /etc/sysconfig/network-scripts/'+$templatenic+' && cat /etc/sysconfig/network-scripts/'+$templatenic+' && /etc/init.d/network restart'
      #修改并重启网卡
      Get-VM $vm.Name | Invoke-VMScript -ScriptText $sss  -GuestUser $templateuser -GuestPassword  $templatepass
}
4.2 在脚本当前目录创建DeployVM.csv
创建的DeployVM.csv,内容有下
Name:vmware vcenter平台显示的虚拟机名称
Template:vmware vcenter的存在的模板名称
PhysicaHost:vmware esxi宿主机IP地址,或者资源池
Datastore:vmware esxi存储名称
Ipaddr:新创建虚拟机的IP
Netmask:新创建虚拟机的子网掩码
Gateway:新创建虚拟机的网关
Hostname:新创建虚拟机的主机名
Esxidir:vmware vcenter里面的目录,即
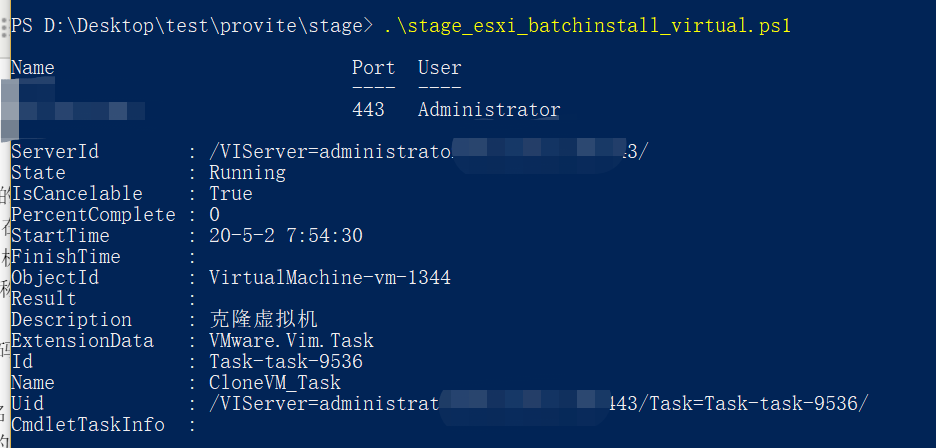
4.3 执行脚本
当前位置按shift键同时右键点击空白处,选择打开PowerShell
本文链接:https://kinber.cn/post/3399.html 转载需授权!
推荐本站淘宝优惠价购买喜欢的宝贝:

 支付宝微信扫一扫,打赏作者吧~

