组网及说明
组网说明
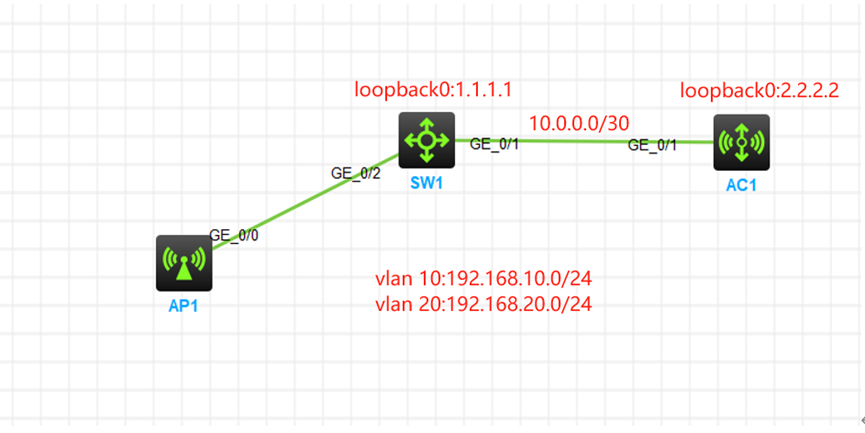
本案例采用H3C HCL模拟器的AC+AP部署跨三层注册的典型组网配置。在本案例中,AC1与SW1采用三层接口互联,通过部署AC+AP的注册上线,实现无线终端的接入。
(1)DHCP服务器部署在SW1。
(2)无线采用本地转发部署。
(3)SW1与AC1配置三层互联和静态路由相互指向。
配置思路:
1、按照网络拓扑图配置VLAN和IP地址。
2、配置SW1与AC1的静态路由。
3、配置AC+AP跨三层注册。
4、提前收集AP的序列号。
配置步骤
(1)基础网络配置。
SW1:
<H3C>sys
System View: return to User View with Ctrl+Z.
[H3C]sysname SW1
[SW1]vlan 10
[SW1-vlan10]quit
[SW1]vlan 20
[SW1-vlan20]quit
[SW1]int vlan 10
[SW1-Vlan-interface10]ip address 192.168.10.1 24
[SW1-Vlan-interface10]quit
[SW1]int vlan 20
[SW1-Vlan-interface20]ip address 192.168.20.1 24
[SW1-Vlan-interface20]quit
[SW1]int loopback 0
[SW1-LoopBack0]ip address 1.1.1.1 32
[SW1-LoopBack0]quit
[SW1]dhcp enable
[SW1]dhcp server ip-pool vlan10
[SW1-dhcp-pool-vlan10]network 192.168.10.0 mask 255.255.255.0
[SW1-dhcp-pool-vlan10]gateway-list 192.168.10.1
[SW1-dhcp-pool-vlan10]option 138 ip-address 10.0.0.2
[SW1-dhcp-pool-vlan10]quit
[SW1]dhcp server ip-pool vlan20
[SW1-dhcp-pool-vlan20]network 192.168.20.0 mask 255.255.255.0
[SW1-dhcp-pool-vlan20]gateway-list 192.168.20.1
[SW1-dhcp-pool-vlan20]dns-list 114.114.114.114
[SW1-dhcp-pool-vlan20]quit
[SW1]ip route-static 0.0.0.0 0.0.0.0 10.0.0.2
[SW1]int gi 1/0/2
[SW1-GigabitEthernet1/0/2]po li tr
[SW1-GigabitEthernet1/0/2]undo po tr pe vlan 1
[SW1-GigabitEthernet1/0/2]po tr pe vlan 10 20
[SW1-GigabitEthernet1/0/2]port trunk pvid vlan 10
[SW1-GigabitEthernet1/0/2]quit
[SW1]int gi 1/0/1
[SW1-GigabitEthernet1/0/1]port link-mode route
The configuration of the interface will be restored to the default. Continue? [Y/N]:y
[SW1-GigabitEthernet1/0/1]ip address 10.0.0.1 30
[SW1-GigabitEthernet1/0/1]quit
[SW1]save force
AC1:
<H3C>sys
System View: return to User View with Ctrl+Z.
[H3C]sysname AC1
[AC1]int loopback 0
[AC1-LoopBack0]ip address 2.2.2.2 32
[AC1-LoopBack0]quit
[AC1]int gi 1/0/1
[AC1-GigabitEthernet1/0/1]port link-mode route
[AC1-GigabitEthernet1/0/1]ip address 10.0.0.2 30
[AC1-GigabitEthernet1/0/1]quit
[AC1]ip route-static 0.0.0.0 0.0.0.0 10.0.0.1
(2)配置AC+AP跨三层注册。
AC1:
[AC1]wlan auto-ap enable
[AC1]wlan auto-persistent enable
[AC1]wlan global-configuration
[AC1-wlan-global-configuration]firmware-upgrade disable
[AC1-wlan-global-configuration]quit
[AC1]wlan service-template weijianing
[AC1-wlan-st-weijianing]ssid weijianing
[AC1-wlan-st-weijianing]vlan 20
[AC1-wlan-st-weijianing]client forwarding-location ap vlan 20
[AC1-wlan-st-weijianing]service-template enable
[AC1-wlan-st-weijianing]quit
[AC1]wlan ap AP1 model WA6320-HCL
[AC1-wlan-ap-AP1]serial-id H3C_78-17-ca-9b-03-00
[AC1-wlan-ap-AP1]vlan 10
[AC1-wlan-ap-AP1-vlan10]quit
[AC1-wlan-ap-AP1]vlan 20
[AC1-wlan-ap-AP1-vlan20]quit
[AC1-wlan-ap-AP1]radio 1
[AC1-wlan-ap-AP1-radio-1]radio enable
[AC1-wlan-ap-AP1-radio-1]service-template weijianing vlan 20
[AC1-wlan-ap-AP1-radio-1]quit
[AC1-wlan-ap-AP1]radio 2
[AC1-wlan-ap-AP1-radio-2]radio enable
[AC1-wlan-ap-AP1-radio-2]service-template weijianing vlan 20
[AC1-wlan-ap-AP1-radio-2]quit
[AC1-wlan-ap-AP1]quit
此时,在AC1可以看到AP注册上线。
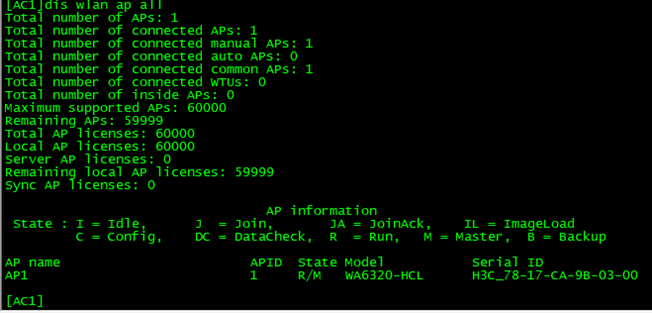
由于是本地转发,需要手动给AP增加配置,首先需要在AC1上开启AP的console登录的权限,然后才能在AP登录操作,或者使用map文件下发的方式下发配置到AP。
在这里就使用在AC1上开启AP的console登录的权限,然后才能在AP登录操作。
[AC1]probe
[AC1-probe]wlan ap-execute all exec-console enable
[AC1-probe]quit
在AP增加如下配置。
[AP1]vlan 10
[AP1-vlan10]quit
[AP1]vlan 20
[AP1-vlan20]quit
[AP1]int gi 0/0/0
[AP1-GigabitEthernet0/0/0]po li tr
[AP1-GigabitEthernet0/0/0]po tr pe vlan 1 10 20
[AP1-GigabitEthernet0/0/0]quit
添加手机到模拟器内,并启动。
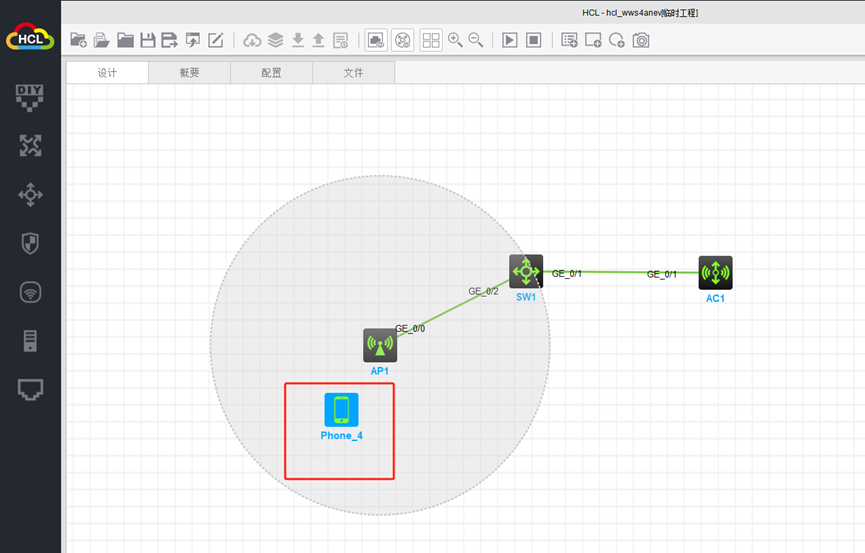
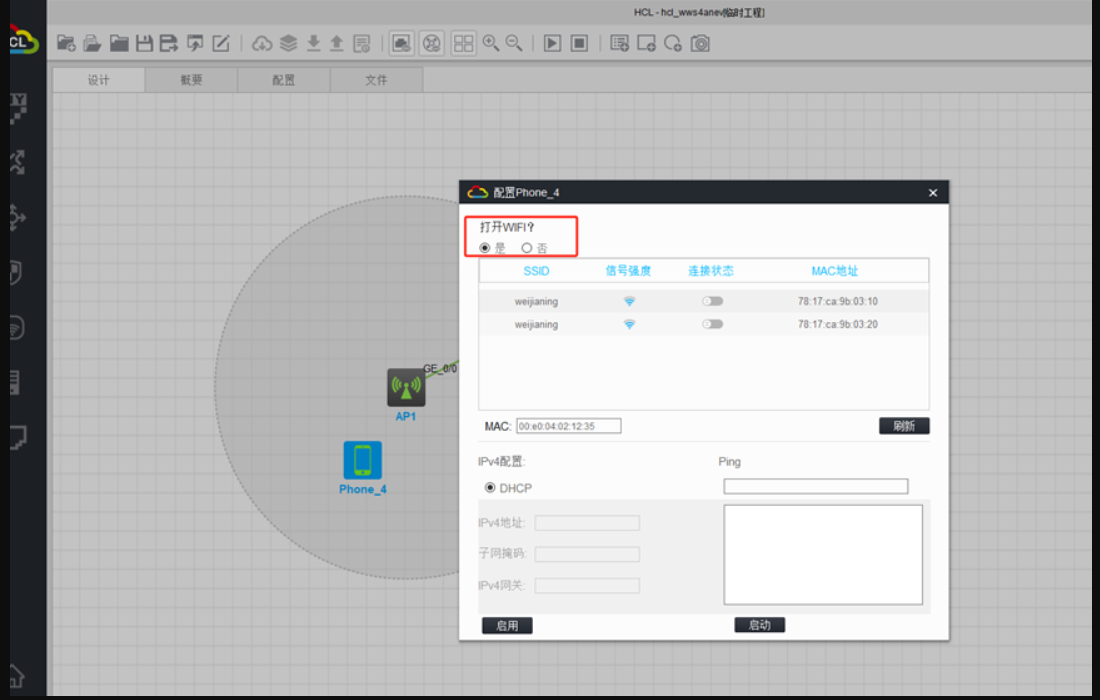
选中手机,右键“配置”
打开WIFI
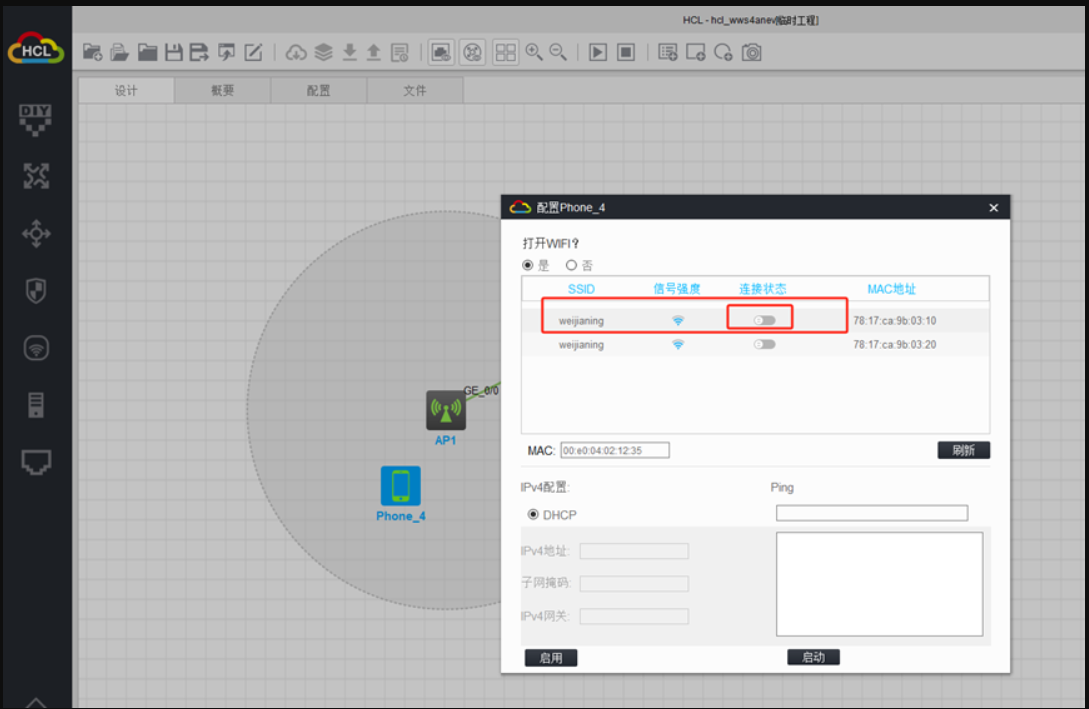
选择相应的SSID,并打开连接。
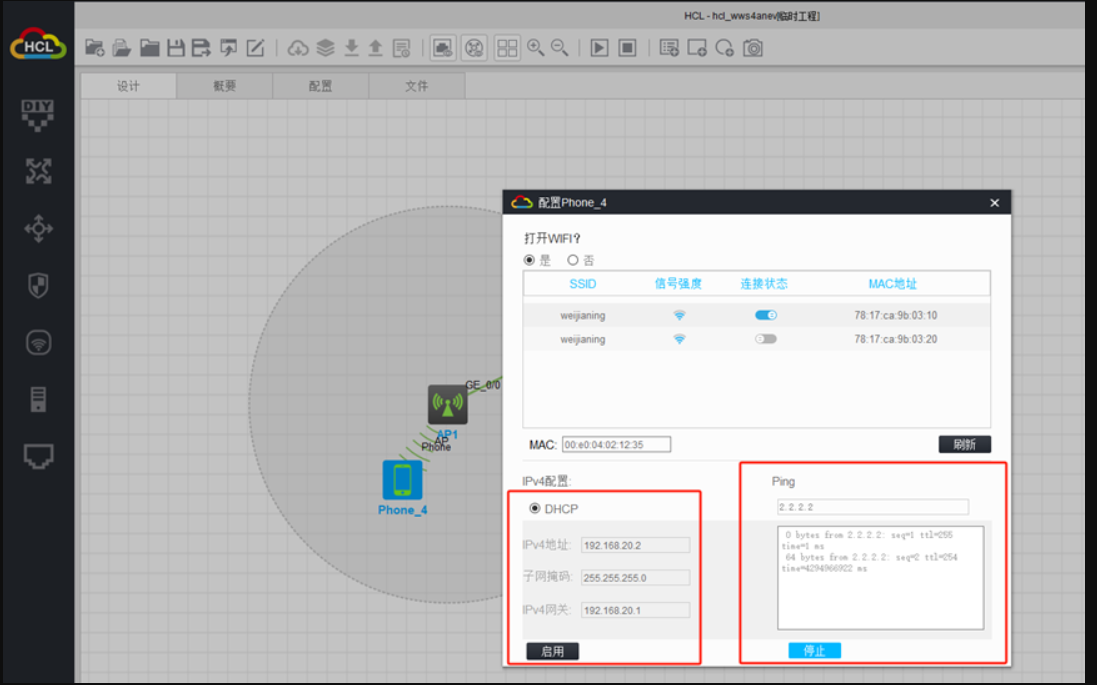
手机能拿到IP地址且能跨网段PING通。
在AC1内能看到手机上线的信息。

至此,AC+AP跨三层注册典型组网配置案例(接口为三层)已完成!
本文链接:https://kinber.cn/post/4326.html 转载需授权!
推荐本站淘宝优惠价购买喜欢的宝贝:

 支付宝微信扫一扫,打赏作者吧~

