Centos部署zabbix5.0
准备环境
| zabbix server | 192.168.142.172 |
|---|
| zabbix database | 192.168.142.172 |
| zabbix agent | 192.168.142.173 |
zabbix server是zabbix的服务端,即zabbix agent收集到主机数据,反馈给zabbix server,而zabbix database是用来存储数据的,将各个主机的数据存储在数据库中,一般使用mysql数据库,在这里,将zabbix server和zabbix database放在一台机器上。
配置yum源
wget http://mirrors.aliyun.com/repo/Centos-7.repo
yum install -y epel-release
yum clean all
yum makecache1234
关闭selinux
sed -i 's/SELINUX=enforcing/SELINUX=disabled/g' /etc/sysconfig/selinux1
关闭防火墙
systemctl stop firewalld.service
systemctl disabled firewalld.service12
配置zabbix的yum源
vim /etc/yum.repos.d/zabbix.repo[zabbix]name=Zabbix Official Repository - $basearchbaseurl=https://mirrors.aliyun.com/zabbix/zabbix/5.0/rhel/7/x86_64/
enabled=1
gpgcheck=0[zabbix-frontend]name=Zabbix Official Repository frontend - $basearchbaseurl=https://mirrors.aliyun.com/zabbix/zabbix/5.0/rhel/7/x86_64/frontend/
enabled=1
gpgcheck=0[zabbix-debuginfo]name=Zabbix Official Repository debuginfo - $basearchbaseurl=https://mirrors.aliyun.com/zabbix/zabbix/5.0/rhel/7/x86_64/debuginfo/
enabled=0
gpgcheck=0[zabbix-non-supported]name=Zabbix Official Repository non-supported - $basearchbaseurl=https://mirrors.aliyun.com/zabbix/non-supported/rhel/7/x86_64/
enabled=1
gpgcheck=0123456789101112131415161718192021222324
安装zabbix
yum -y install zabbix-server-mysql zabbix-agent1
安装centos扩展软件库
yum -y install centos-release-scl1
安装数据库
yum -y install mariadb-server mariadb1
启动数据库
systemctl start mariadb
systemctl enable mariadb12
初始化数据库
mysql_secure_installation1
安装数据库初始化文件和nginx
yum install zabbix-web-mysql-scl zabbix-apache-conf-scl1
创建数据库并授权
mysql -uroot -p
Enter password:

MariaDB [(none)]> create database zabbix character set utf8 collate utf8_bin;MariaDB [(none)]> create user zabbix@192.168.142.172 identified by 'zabbix';MariaDB [(none)]> grant all privileges on zabbix.* to zabbix@192.168.142.172;123456
导入数据库文件
zcat /usr/share/doc/zabbix-server-mysql-5.0.3/create.sql.gz|mysql -uzabbix -pzabbix -h192.168.142.172 -Dzabbix1
修改zabbix配置文件
vim /etc/zabbix/zabbix_server.conf
DBHost=192.168.142.172
DBPassword=zabbix123
配置php环境
vim /etc/opt/rh/rh-php72/php-fpm.d/zabbix.conf

php_value[date.timezone] = Asia/Shanghai123
启动服务
systemctl restart zabbix-server zabbix-agent httpd rh-php72-php-fpm.service

systemctl enable zabbix-server zabbix-agent httpd rh-php72-php-fpm.service1234
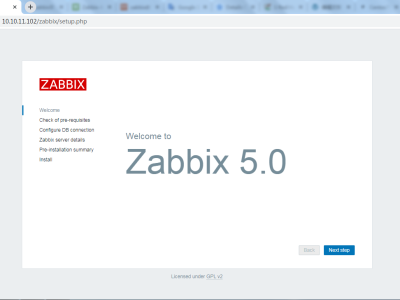
在浏览器输入
http://IP/zabbix
进行zabbix的初始化
初始用户名密码
Admin:zabbix打赏

支付宝微信扫一扫,打赏作者吧~
本文链接:https://kinber.cn/post/1517.html 转载需授权!
推荐本站淘宝优惠价购买喜欢的宝贝:

 您阅读本篇文章共花了:
 支付宝微信扫一扫,打赏作者吧~


